Step 1 - Login:
Login and click the "My Account" link in the main menu.
Step 2 - Select your listing:
In the user menu in the left-hand column, select the "my active listings" link which will show you a list of your "active" listings.

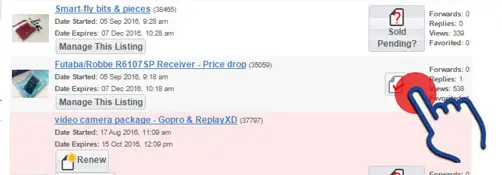
In the listing that you would like to edit, press the "manage this listing" button. This displays the options you can do with your listing.

- Mark as sold pending - Marks your listing as "Sold Pending" but does not remove it as an active listing until the listing duration expires. (once marked as sold pending, click the same button again to "unmark" it and return it to normal status.). The sold pending button is like a switch, it can be switched on and off, unlike deleting your listing. If your listing is showing the "tick" icon, it means "sold pending" is active.

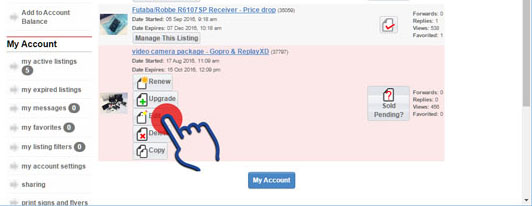
The listing in question will display the options you can do to that listing:
- Renew listing (if avail) - if your listing is about to expire, this option becomes available (you will also be advised by email).
- Upgrade listing (if avail) - upgrade your listing by applying available add-ons like bolding or featured.
- Edit - opens your listing detail for editing
- Delete - deletes your listing (note - you will not be able to retrieve any data from a listing that is deleted)
- Copy - make a copy of the current listing to a new listing

Step 3 - Select the "Edit" option:
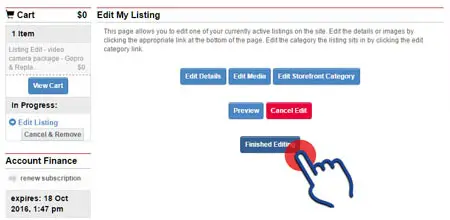
you will be presented with the following options. Select one to continue.
- Edit your details - edit the content fields of your listing
- Edit media - edit, add or remove images or YouTube links
- Edit Storefront category (if avail) - If you are running a Storefront, this will allow you to change your storefront categories applied to this listing
- Preview - opens a new page with a preview of the changes made
- Cancel edit - cancels all changes and returns you to your account (no data will be saved)
- Finish edit - you will need to press this when you have made all your changes so your changes will be saved.

Step 3 - Edit listing details:
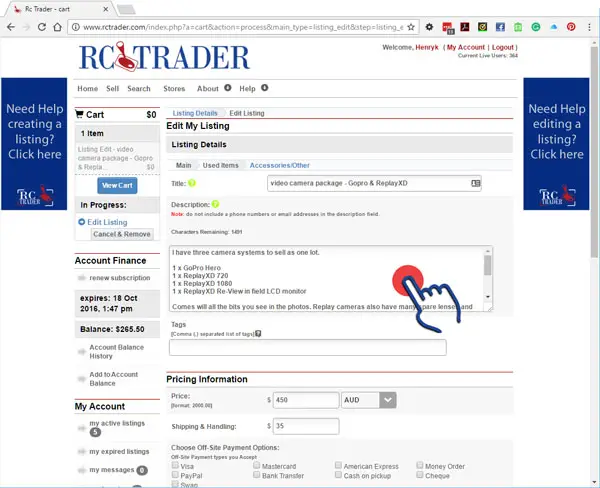
After selecting "Edit your details", you are presented with the listing information page as it currently exists. Make any edits to the information as you require. Note: some fields of information will have an impact in other areas that may not seem immediately obvious. e.g. the currency field.

DO NOT include your email address or your phone number in the description field. This increases the risk of your information being abused. This information is presented to registered users in the specified fields. (Note: only registered users will see your contact information).
When you have completed the form, select the "Continue>>" button at the bottom of the page.
NOTE: If you are presented with the listing information page again, check that there are no required fields that you may have missed. They will be highlighted in red.
Step 4 - Upload/edit images:
By selection the "Edit media" option, you will be presented with the opportunity to add,edit, rotate or delete your images. You can add up to five images for free (extra images at a cost - For further information on pricing, please view the pricing page).
The allowed image upload types are JPEG (jpg), GIFF (gif), BMP (bmp), PNG (png) or TIFF (tif).
Click on the instructions button to open up the in-page instructions that explain each button on this page.
Click the "select files" button that will open a browser window. Select the image file(s) you want to upload and press "open". The browse window will close and the upload will start automatically. Please note that depending on your image size and your internet connection speed, this may take up to a few minutes.
When the upload is complete, the image thumbnail(s) for the image(s) you just uploaded will be visible and you will be presented with the opportunity to make any further changes.

When you have uploaded all your images, press the "Continue>>" button at the bottom of the page.
Step 5 - Finalise your changes:
By pressing the "Finish Editing" button you will save all the changes you have made.

If you do not complete this process, your changes will be stored in the cart. Next time you return to your account, you will notice that you have in the left-hand menu, an "in progress" notification that shows:
- In Progress: Edit Listing ( and the options to "resume" or "cancel and remove")
To resume editing a listing, or complete an unfinished edit, click the "resume" button in the left-hand column.
Please note that all listing edits need to be approved by an admin before they are published as live. Although this process can take up to 24hrs depending on when your listing is submitted, normally they are approved much faster.